

Clip-in Ceiling System
The Clip-in Ceiling System is probably the most widely used metal tile ceiling system, which clips onto the suspended grid and therefore conceals the grid from view. Manufacturers have their own unique clip-in systems that match their boards but generally they all consist of a spring tee runner from which boards clip on to. The robust grid system is easily installed and tiles can be removed and replaced for access to services. Modular or circular light fitting and grilles can be integrated within the Clip-In System, and various acoustic criteria can be met with the inclusion of acoustic inlays.
Plain or Perforated patterns can be selected according to the actual requirement.
Characteristics
- Clip in-ceiling system allows the tiles to be fitted from the underside of the ceiling, creating a very fine (often beveled) joint.
- A sealed ceiling design with simple clip-in panels provides easy access to the enclosed plenum using the necessary tools
- Available in multiple squared and beveled edges to create customized visual effects
- Concealed suspension system offers a smooth appearance
- Individually replaceable panels
Application
Mostly used in big area ceilings such as shopping mall, station, gymnasium, banks, hospital and exhibition halls.
Design & Inspiration Characteristics
Tile ceilings feature a square design of the panels. When one needs a robust ceiling this is a perfect choice. Different
depths of the recesses can create subtle patterns that provide the perfect look for your project.


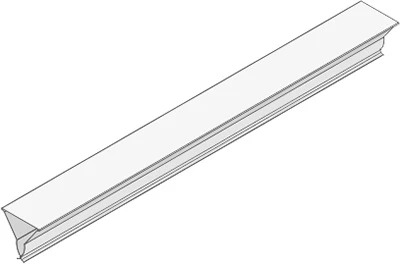
Triangle Keel (applicable for any specifications of invisible frame type aquare plate)
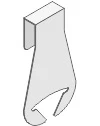
Triangle Keel Hanging Parts
Flexibly bend according to actual situation
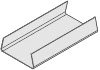
Triangle Keel Connecting Parts
1. Install the wall angle in the same height;
2. Install the light steel main keel in suitable space, the distance between hanging poles should accord to the light steel main keel;
3. Binding the light steel main keel with the prepared hanging parts on the triangle keel, then clamp it under the light steel main keel in the vertical direction, the space of the triangle keel accords to the width of the plate, adjust it to level after finishing installation;
4. Press the two parallel edges into the triangle keel slot,firstly install one row of plate breadthwise and lengthways. make sure they are perpendicular, then install the rest plates;
5. Wear gloves when installing if finger printers or stains remain on the plates, please remove it off with warm water and detergent, then dry it.
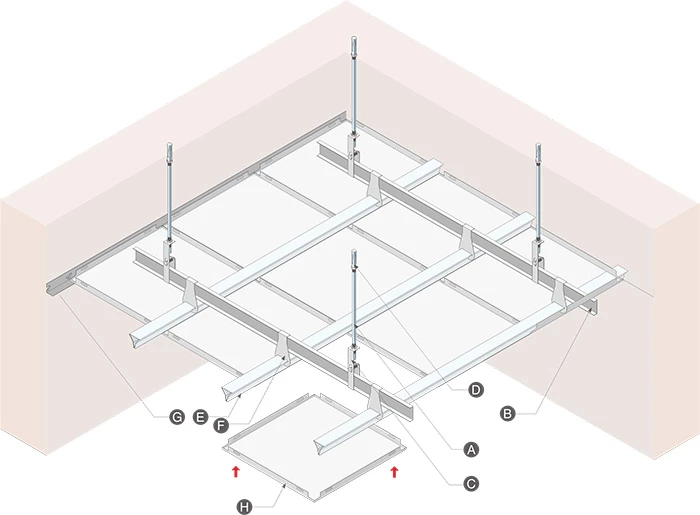
A. Hanging pole
B. 38 main keel
C. Hanging parts of 38 main keel
D. Explosive bolt
E. Triangle keel
F. Hanging parts of triangle keel
G. Wall angle
H. Square plate

